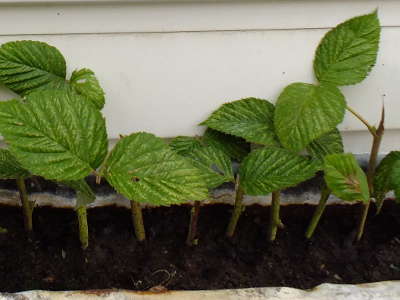
How to clone plants from cuttings
Cloning plants through cuttings is a simple and effective way to propagate many plant species. This method involves taking a small section of a parent plant and encouraging it to develop roots and grow into a new, independent plant.
Step 1: Choose the Right Season
- Deciduous Plants: Take hardwood cuttings during late winter (August–September) when the plant is dormant.
- Evergreens: Softwood cuttings are best in late spring (October–November) or early summer (December).
- Herbaceous Plants: Take cuttings during active growth in spring or summer (October–February).
Step 2: Select and Prepare the Cutting
- Choose Healthy Parent Material: Select a non-flowering stem that is free of pests or disease.
- Cutting Length: Use sharp, sterilized scissors or pruners to take a cutting approximately 10–15 cm long.
- Node and Leaves:
- Ensure the cutting has at least 2–3 nodes (where leaves or buds emerge).
- Remove the leaves from the bottom two-thirds of the cutting. If the remaining leaves are large, cut them in half to reduce water loss.
Step 3: Prepare for Rooting
- Use Rooting Hormone (Optional):
- Dip the cut end into rooting hormone powder or gel to stimulate root growth and protect against fungal infections.
- Planting Medium:
- Fill a small pot or tray with a well-draining propagation mix (e.g., 50% coarse sand and 50% coconut coir or perlite).
- Water the medium lightly to make it moist but not soggy.
Step 4: Plant the Cutting
- Insert the Cutting:
- Make a hole in the medium with a pencil or stick.
- Insert the cutting so that at least one node is buried in the medium.
- Firmly press the medium around the cutting to ensure good contact.
- Spacing:
- Keep cuttings about 5 cm apart if planting multiple in one tray.
Step 5: Create a Humid Environment
- Mini Greenhouse Effect:
- Cover the pot or tray with a clear plastic bag or a plastic bottle cut in half to maintain humidity.
- Ensure the plastic does not touch the cutting by using small sticks or supports.
- Light and Temperature:
- Place in a warm, bright spot with indirect sunlight.
- Maintain temperatures between 18–24°C, avoiding temperature extremes.
Step 6: Monitor and Maintain
- Watering: Keep the medium consistently moist but not waterlogged.
- Ventilation: Remove the cover for a few hours daily to prevent fungal growth.
- Check for Roots: After 3–6 weeks, gently tug the cutting to feel for resistance, indicating root development.
Step 7: Transplant the Cutting
- Once roots are 2–5 cm long, transplant the cutting into a pot with nutrient-rich soil.
- Gradually acclimatize the plant to outdoor conditions before planting it in its final location.
Tips for Success
- Choose Appropriate Plants: Common plants for cuttings include lavender, rosemary, geraniums, succulents, and fruiting plants like figs or grapes.
- Hygiene: Always use sterilized tools and clean pots to prevent diseases.
- Moisture Control: Use a spray bottle to mist cuttings instead of overwatering.
- Patience: Some species take longer to root than others; be patient and check regularly.
- Label: If propagating multiple plants, label them to avoid confusion.

